Our Diamond-Certified team is ready to assist you with all your pool and spa needs. We often receive questions and calls from potential clients interested in our process and wondering “how this all works?”
As a BBB-accredited company, we strive each day to provide our clients with the best customer experience possible. We want our clients to rest assured in both their decision to choose us as their swimming pool contractor as well as their pool design decisions.
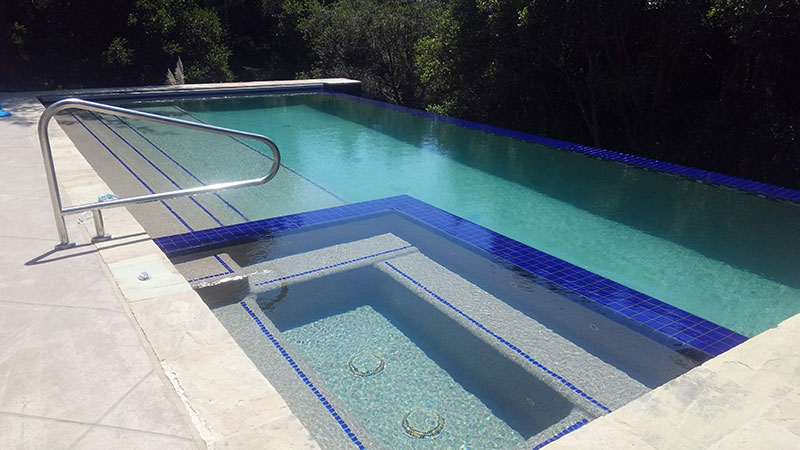
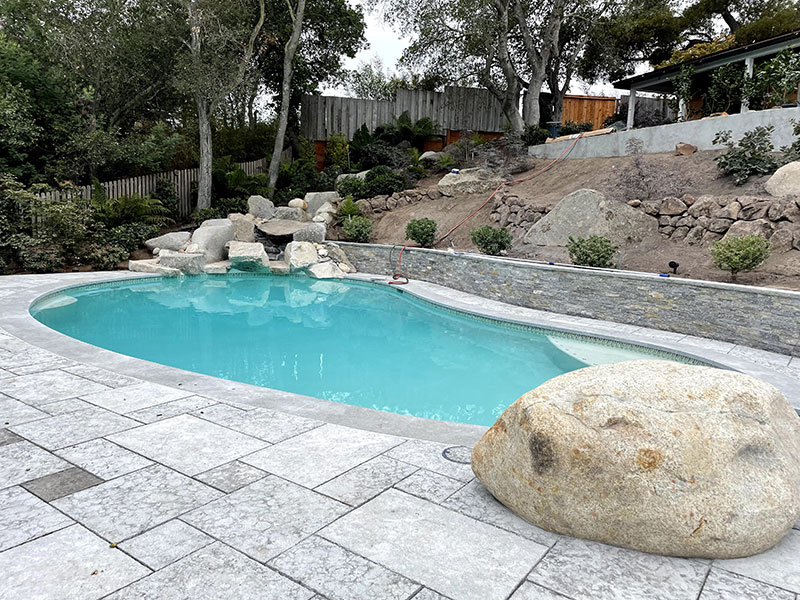
Check out this detailed, step-by-step explanation of our pool construction process, from conception to completion!
Getting A Permit
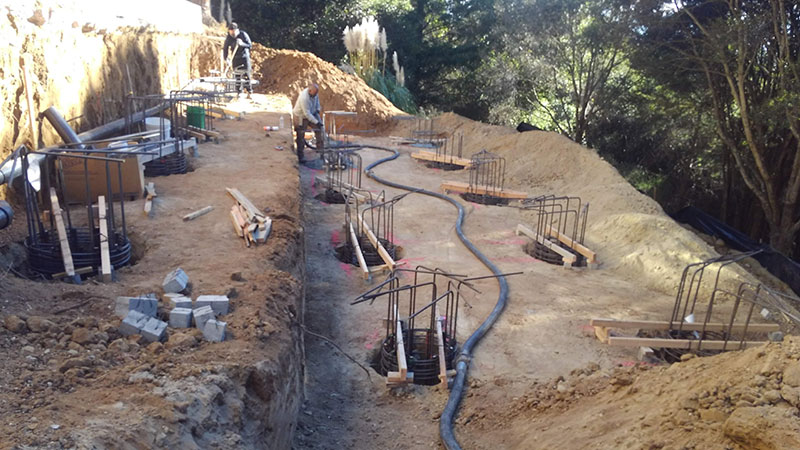
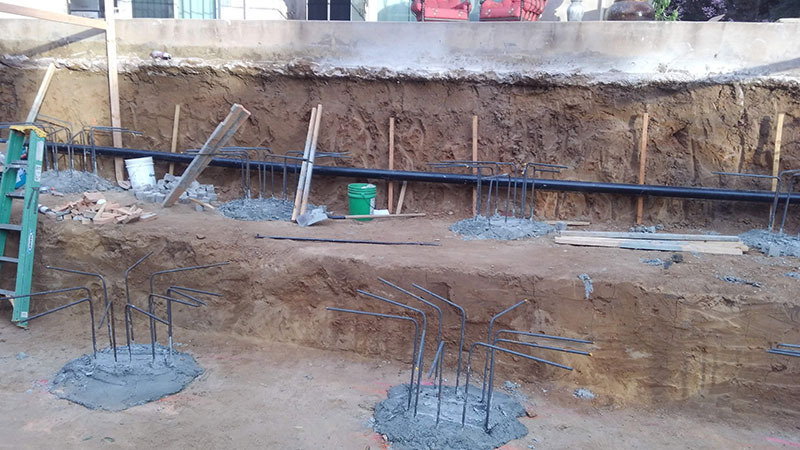
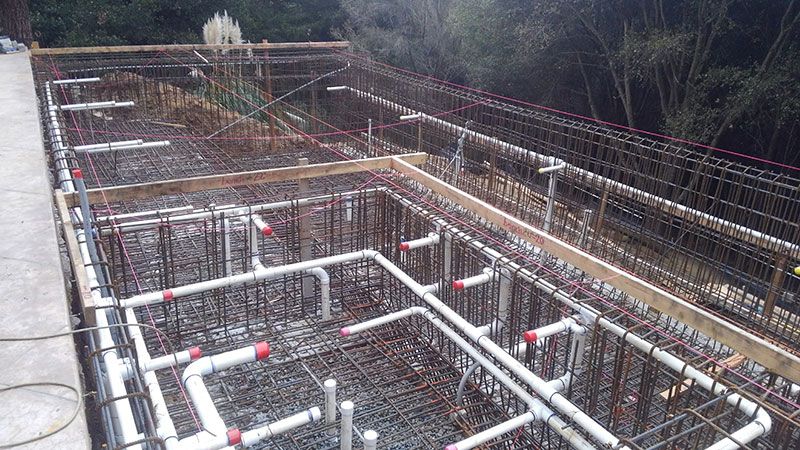
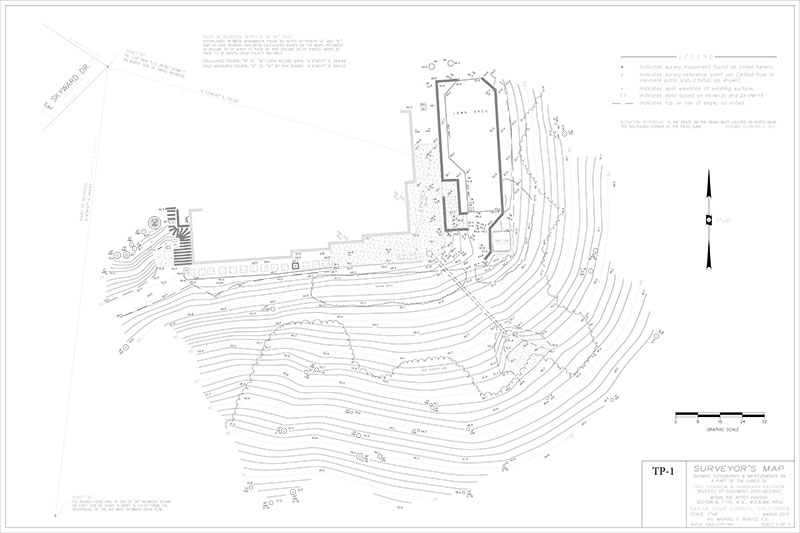
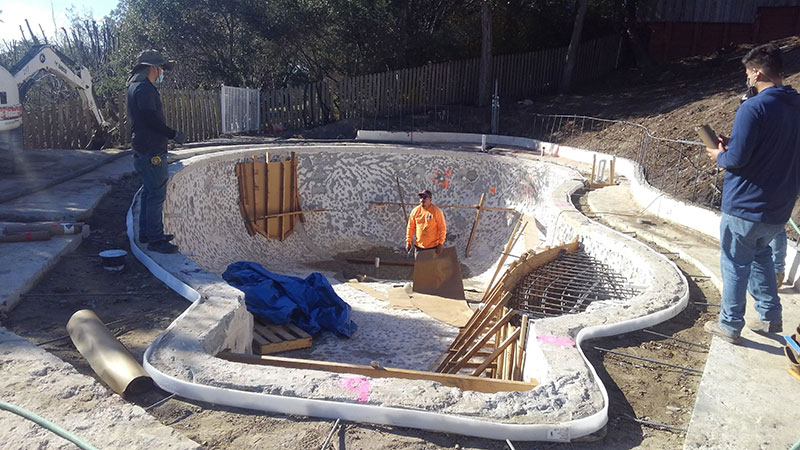
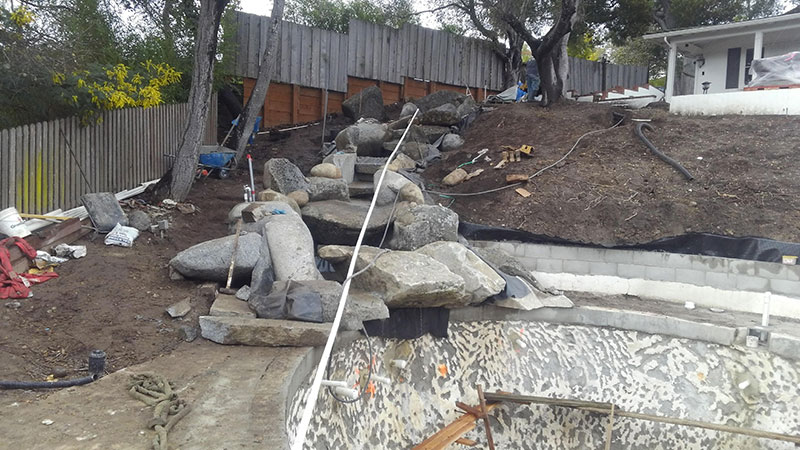
With the California Pool Safety Act 2018 in full effect, this means we can’t just put a pool in anywhere. We need to ensure your project is both structurally and environmentally stable, and it all starts with a concept. We need to know about your new pool or spa, how and where you want it. After we’ve got the concept drawn out and ready to go it’s time to get the engineers involved. Yes, engineers. To take your concept from a drawing to a plan to get permits, we must contact a civil engineer, a geotechnical engineer, a structural engineer, a landscape architect, and an irrigation designer.
The civil engineer has to provide a topo map of your property with contour lines and property survey, erosion control and drainage plan, and best management practices for erosion control and the project as a whole. They coordinate the plan process and compile everything into the full set of plans.
The geotechnical engineer has to bore into the ground where the pool is to be built and provide a report that is then sent to the structural engineer who tells us how to build the pool. What steel layout is required, whether we have to anchor the pool in any way, or specific requirements for your site.
The Pool Safety Act added the requirement for a landscape and irrigation plan that complies with water saving requirements.
The pool builder has to provide the plumbing layout for the pool/spa, the equipment room plumbing layout, the electrical schematic and brochures of all the equipment to be installed on the job. Once these 25 to 35 sheets of plans are compiled we are ready to bring them to the County that has jurisdiction over your property. Now we no longer deliver sets of plans–6 copies was standard–it’s all delivered digitally with fees paid online. After waiting for comments, answering the questions and going through the process at the county, which can take anywhere from 1-3 months to a year, we are finally ready to dig your pool.


Pool Remodel Process
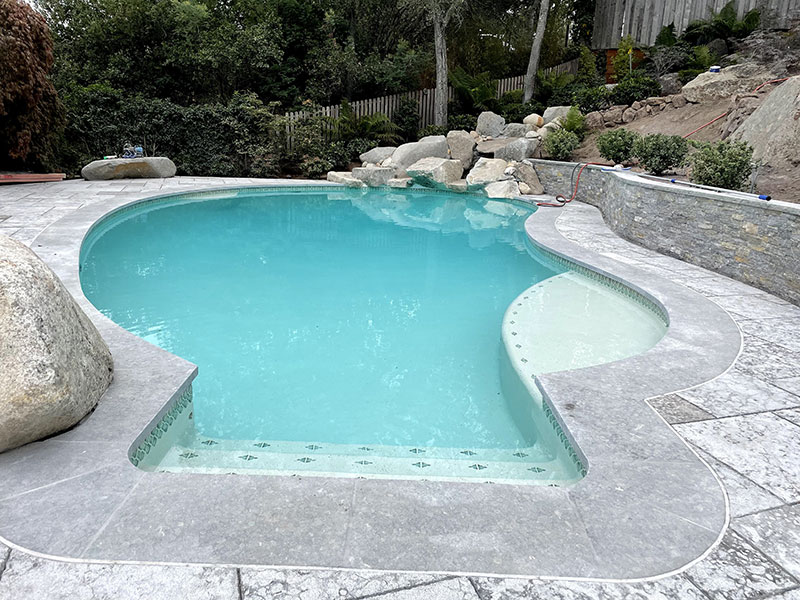
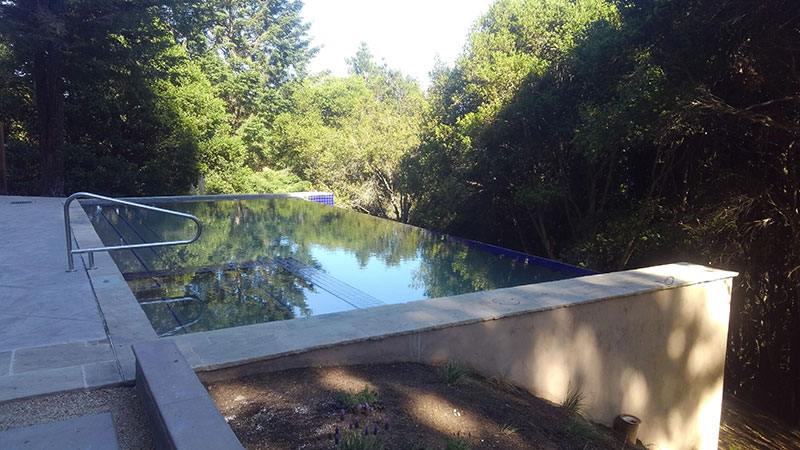
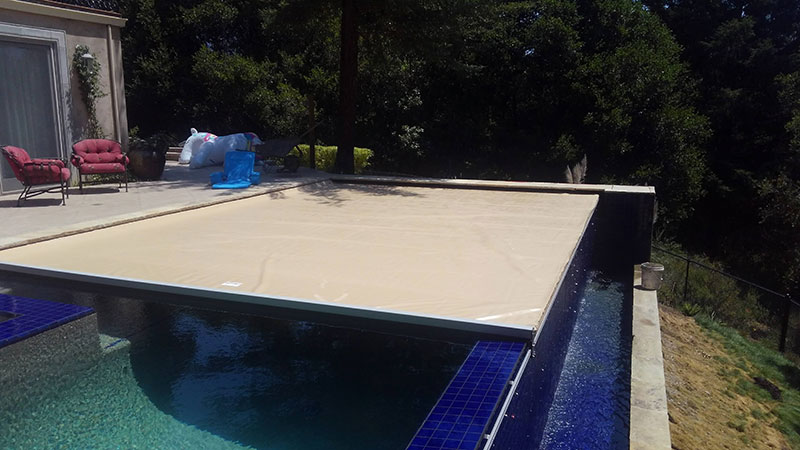
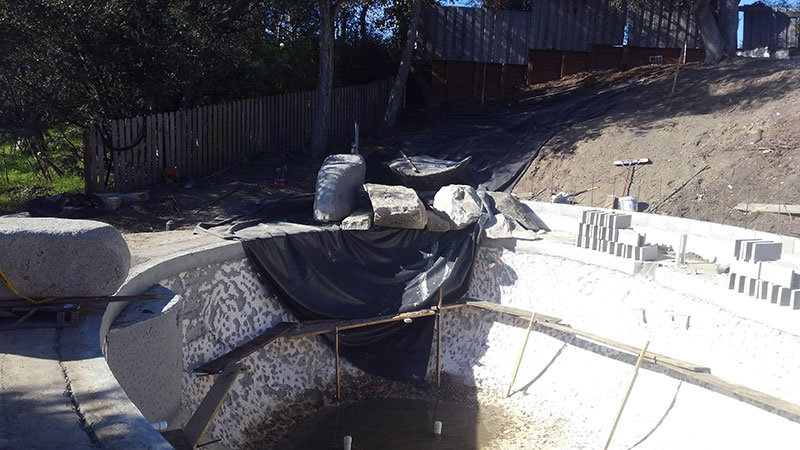
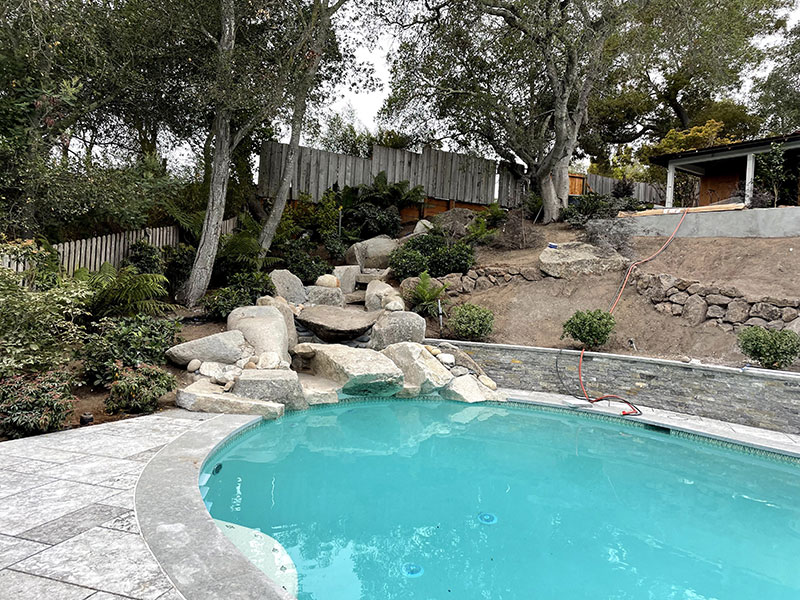
SO you already have a pool and it looks old and tired, or leaks or has been without water for years. We love to do remodels! Better still, we don’t need to go through the permit process for remodels since we’re just repairing what has already been permitted. Our Portfolio shows some of the pools we have remodeled and that we sometimes stretch remodeling to include some pretty amazing additions such as water slides and waterfalls. We also redo pool decks and can add deck jets and lights. Our remodels make the pool look fresh and exciting again.
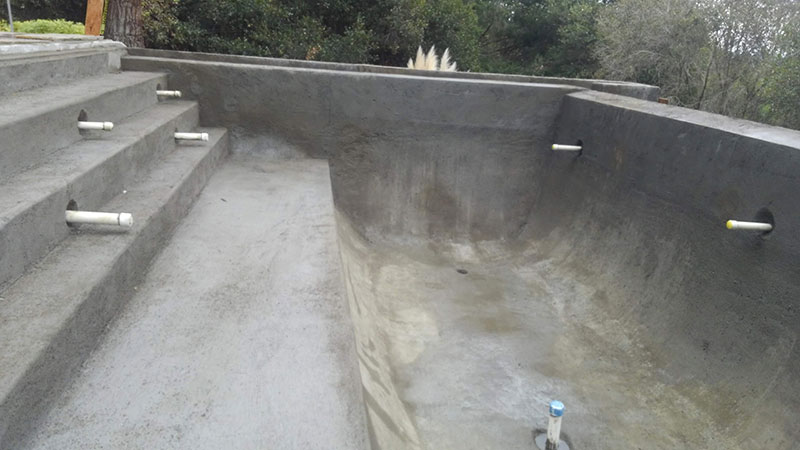
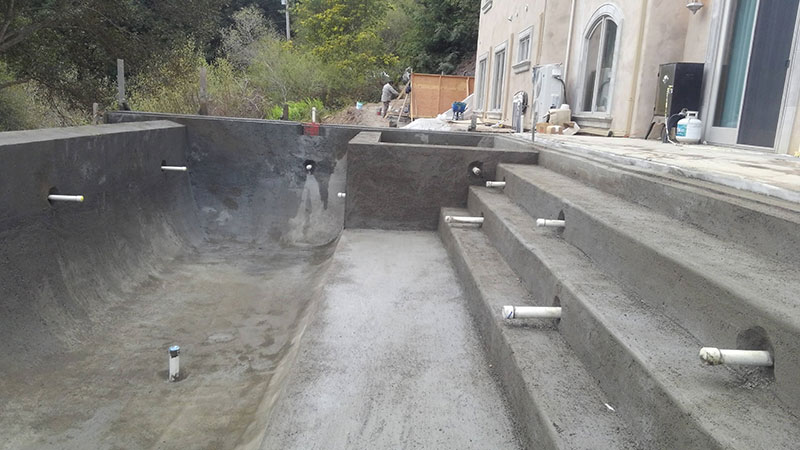
First thing’s first, we have to drain the pool and drill a hole in the bottom in case there is excess moisture or a high water table that could cause the pool to “float.” Once a pool floats there is little to do but start over completely, so we take precautions by drilling a hole in the bottom to release any pressure.
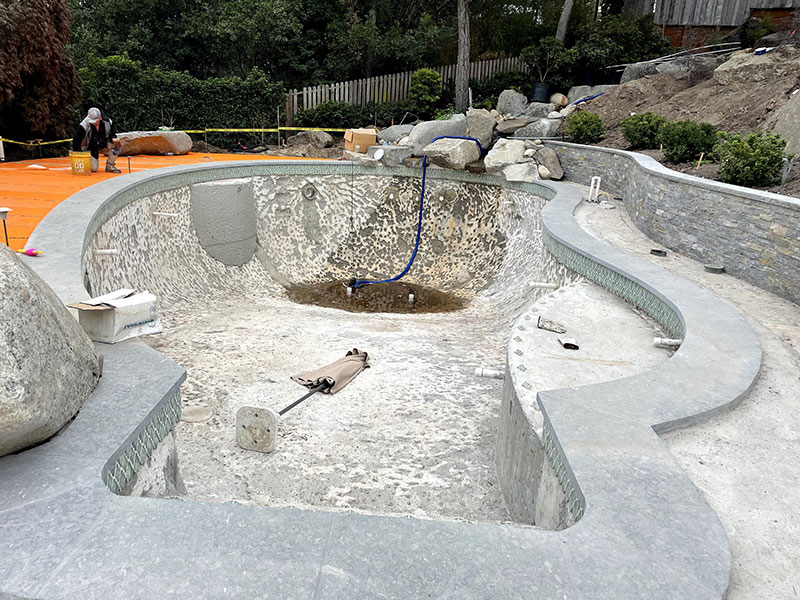
Next we strip the plaster and tile from the pool shell. This can take up to 2 days, depending on the size of the pool, as we use small jackhammers to strip off the plaster from the gunite shell. This leaves the pool fairly rough, like a furrowed field, and that is by design. The rough, pitted surface helps the new plaster adhere better and makes it less likely to ever delaminate.
After stripping the plaster from the pool we usually have to split the main drain or the main suction line into 2 suctions from the bottom of the pool. These suctions have to be equally spaced from the center plumbing so water pulls equally from both main drains.
This is required by the Virginia Graham Baker act, enacted to prevent people from getting caught by the singular suction of the main drain.
We also check to see if the surface skimmer is cracked, needs replacing or is poorly functioning. If so, we break out that area of the pool, install a new plastic skimmer and pour non shrink concrete around the skimmer to waterproof it prior to plaster.
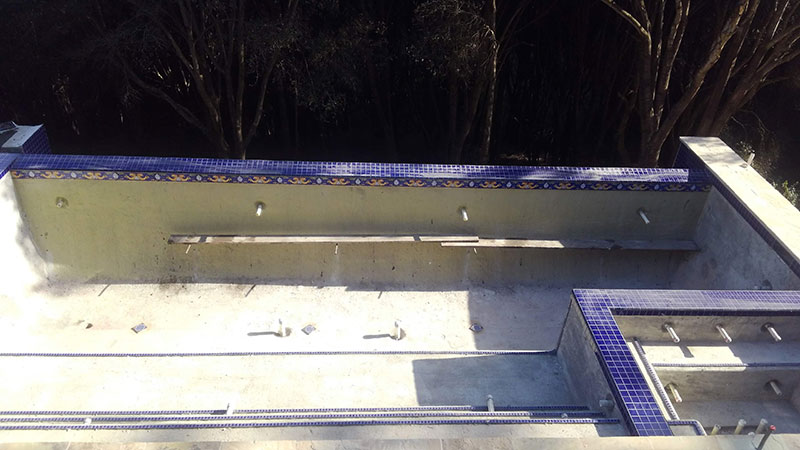
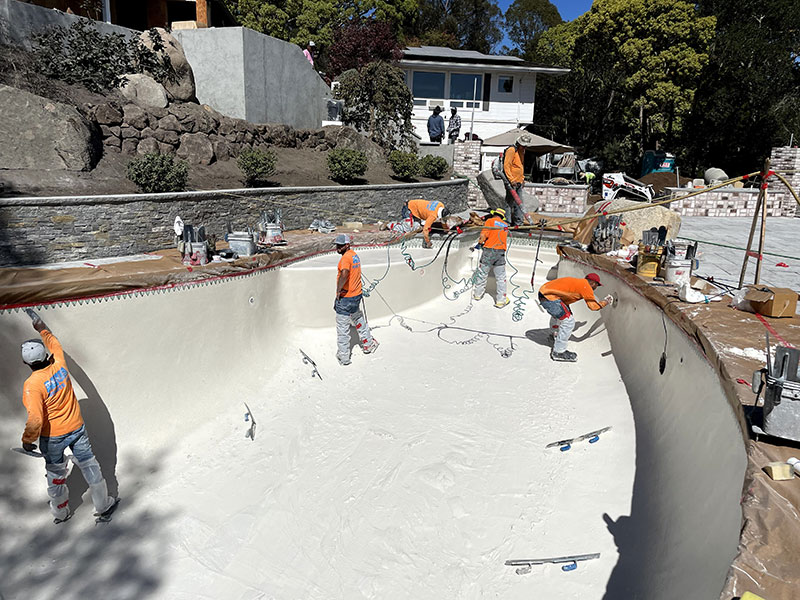
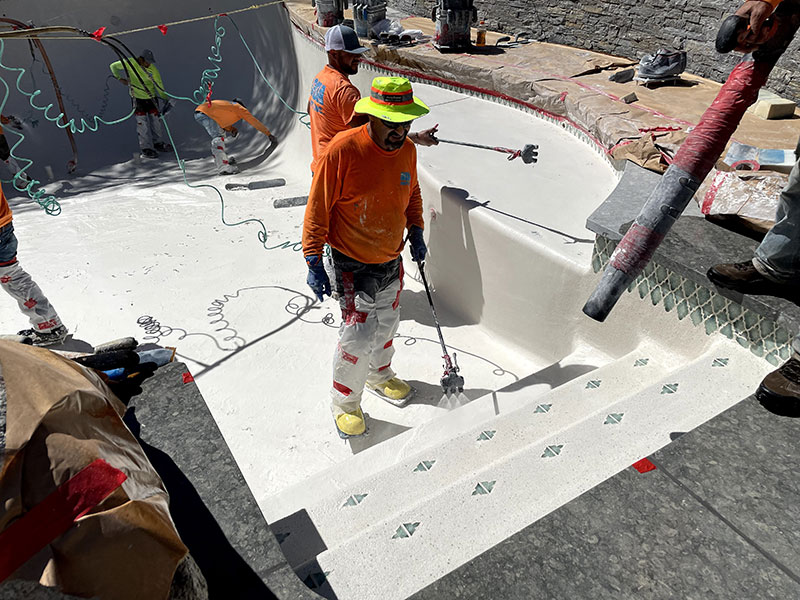
Now that we have taken care of the problems with the “old pool” we are ready to make it look new again. Time for all the bells and whistles! We float a new backing for the waterline pool tile and put in new tile. If there are steps leading into the pool, swim out benches or benches in an adjoining spa we usually install nosing tile to define the edge of the steps or benches. This adds a great accent to the pool and looks great with new plaster.
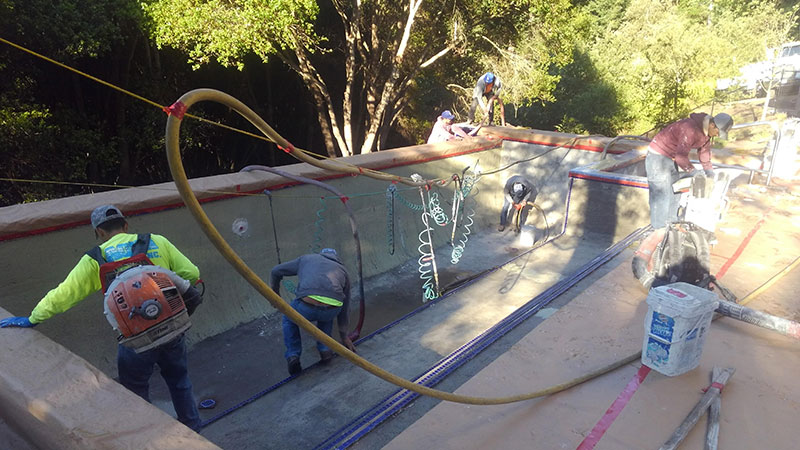
Once the tile is installed we are ready for plaster. We are Pebble Tec installers and there is a wonderful array of different plaster finishes to choose from. We tend to use Pebble Sheen the most and find it beautiful and amazingly tough. Pebble Sheen plaster has tiny pebbles that form a tight bond on the bottom and sides of the pool that last much longer than regular plaster of sand and cement. And it looks so much better! The other advantage of Pebble Sheen is it reaches a water balance quicker than normal plaster because it is acid washed and buffed the day after it is installed. This eliminates the plaster dust and big swings in Ph as the concrete in the plaster cures in the water.
The other thing that may come up in remodeling your pool is the equipment. Depending on the age of your equipment and how well it is working sometimes we bring the equipment up to modern standards at the same time as making the pool look new.
Pumps now are required to be Variable speed to cut down on electrical use. These new pumps start slow and are much quieter than the old single speed pumps. We like to use sand filters, which can be backwashed. We also use glass as a filter media as it is less likely to clog and backwashes more completely. UV and Ozone as well as Salt Water chlorination offer ways to sanitize that reduce the amount of chemicals required to keep the pool water safe and sanitized for everyone to use. Then there is the heater.
With so many homes having PhotoVoltaic panels on their roofs it makes sense to install heat pumps which take advantage of temperature variances to transfer heat. These are amazing heaters but are expensive to operate unless you have a surplus of power generating from the sun.
It is a great advantage to have a pool already and to make it new over not having one and having to start from scratch. Either way we are here to make water a part of your life and look forward to working on your pool project

Contact Us
Contact Us for your free, on-site consultation (and please tell us how you found our website, our reduced advertising budget saves you money!)